
{ Guides }
How to Connect Your D'CENT Wallet to SOIL XRPL and Allocate XRP
Time to read: X min
A step-by-step guide to connecting your wallet, confirming your email, completing KYC, and allocating XRP to the SOIL XRP Vault.
SOIL makes it possible to access its XRP Vault through a non-custodial XRP wallet. In this walkthrough, we will use the D'CENT mobile wallet and complete the full onboarding flow shown in the SOIL XRPL app: wallet connection, newsletter confirmation, identity verification, and XRP allocation.
The screenshots follow a mobile session. The interface, available vaults, rates, minimum allocation, notice period, and eligibility requirements may change, so always rely on the live information displayed in the app before confirming.
Before You Begin
Have the following ready:
- the D'CENT mobile app with an XRP account;
- enough XRP for your intended allocation and any balance requirements shown by your wallet or the network;
- access to your email inbox;
- a valid identity document;
- a phone camera and a stable internet connection.
How the XRP Allocation Flow Works
Three components work together when you allocate XRP:
- SOIL XRPL creates the allocation transaction from the amount and terms you selected.
- D'CENT asks for your approval and signs the transaction with your wallet after authentication.
- The XRP Ledger processes the signed transaction. SOIL reads the result and updates the allocation status.
This separation is why SOIL can coordinate the vault flow without asking you to hand over your wallet's recovery phrase or private key.
The SOIL web app prepares a request and passes it to D'CENT. Your wallet displays the request and signs it only after you approve and authenticate. Your private keys remain inside your wallet. Later, when you allocate XRP, D'CENT appears again because that allocation requires a separate approval and signature.
Connect D'CENT Wallet to SOIL XRPL
Step 1: Open SOIL XRPL and Select D'CENT
Open https://xrpl.soil.co on your phone and tap Connect Wallet. When the wallet list appears, select D'CENT.
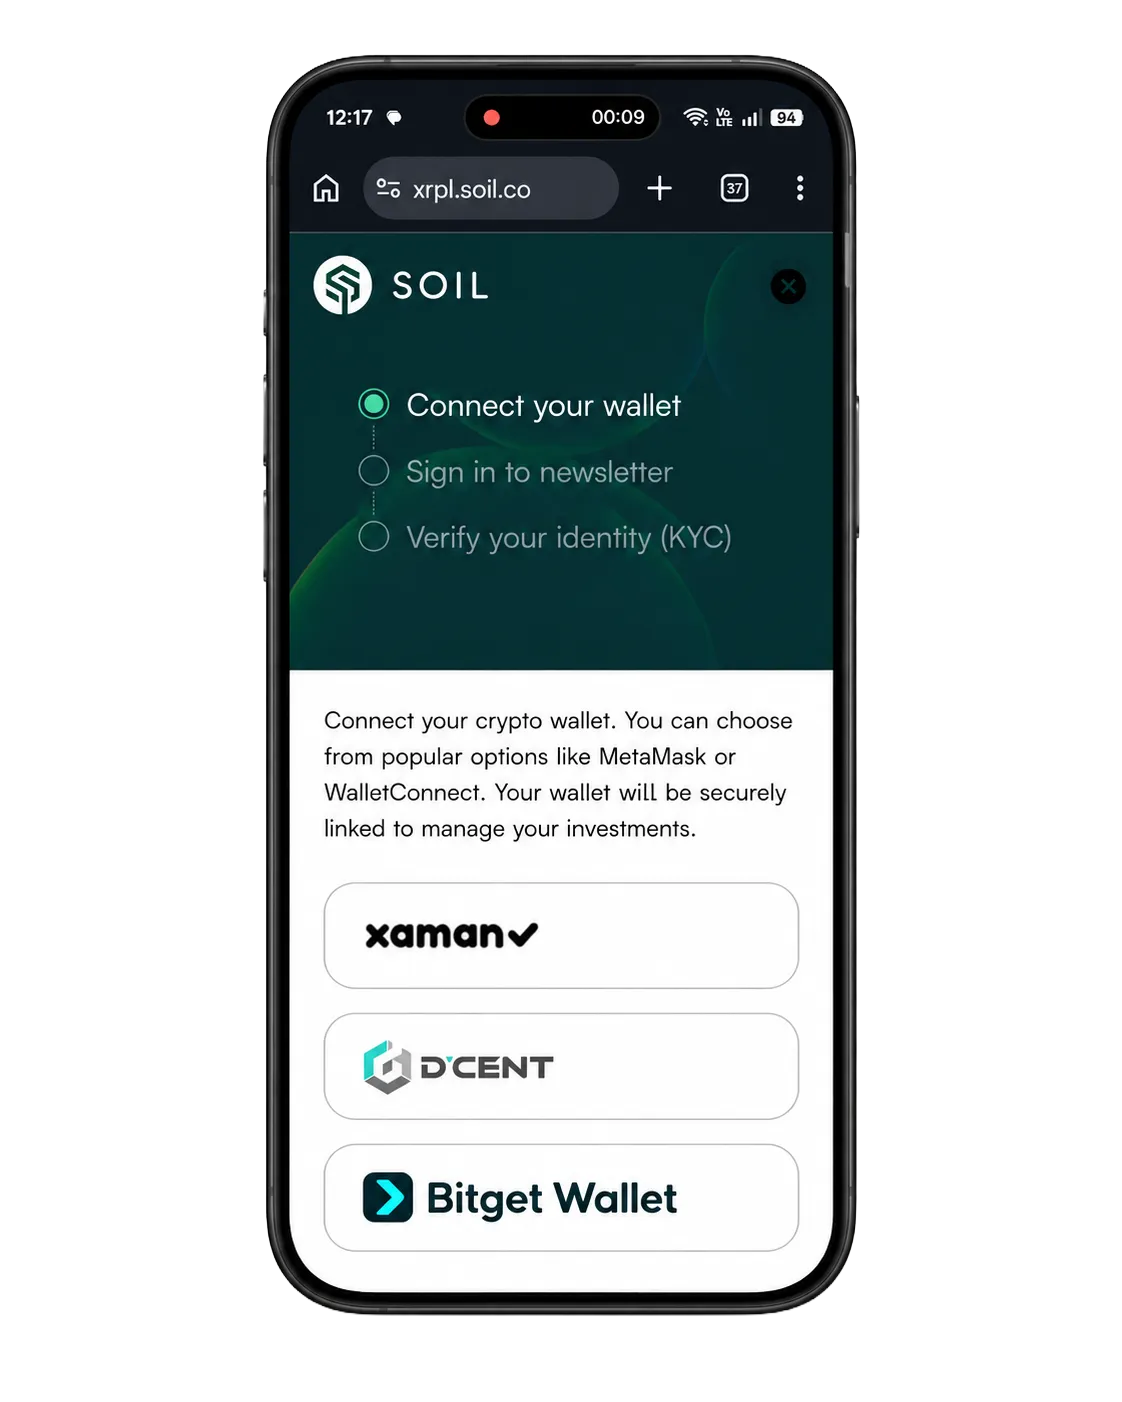
Choose D'CENT from the supported wallet options.
Step 2: Approve the Connection Request
D'CENT opens a Connect Dapp screen for SOIL XRPL. Confirm that the request comes from https://xrpl.soil.co, check the XRP account displayed by the wallet, and tap Connect.
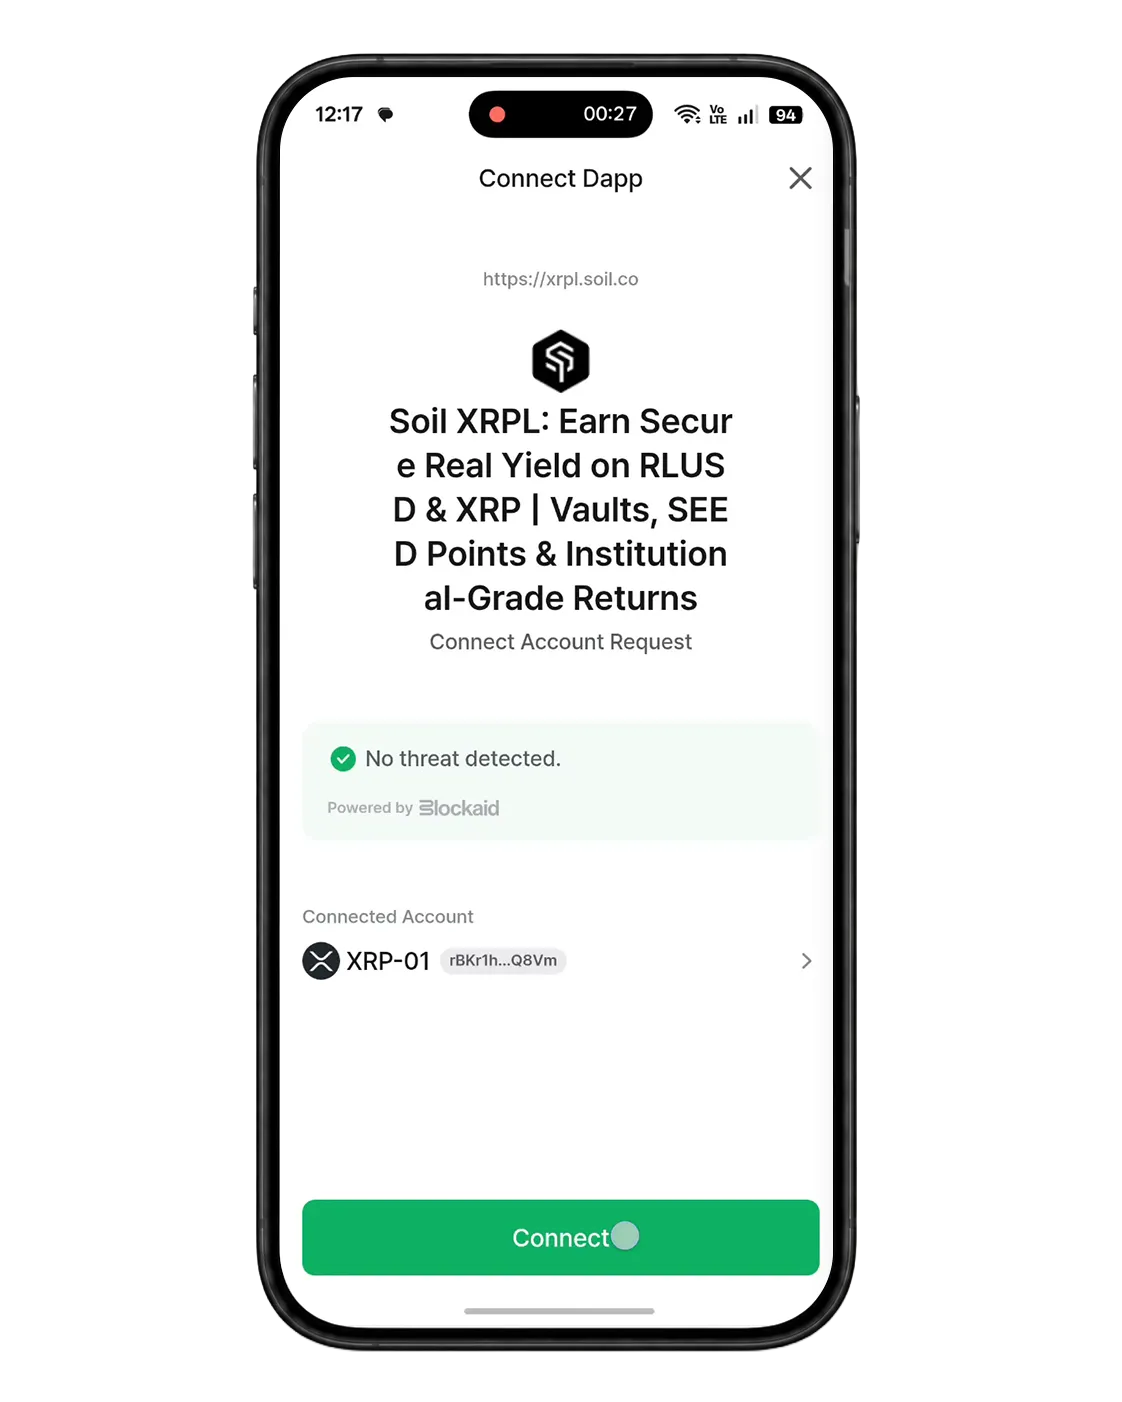
Verify the website origin and connected XRP account before continuing.
Step 3: Review and Sign the Wallet Request
D'CENT first displays a Signature Confirmation screen. Review the request details carefully. If the origin, account, and requested action match what you initiated on SOIL, tap Sign. D'CENT then asks you to authenticate and proceeds with signing.
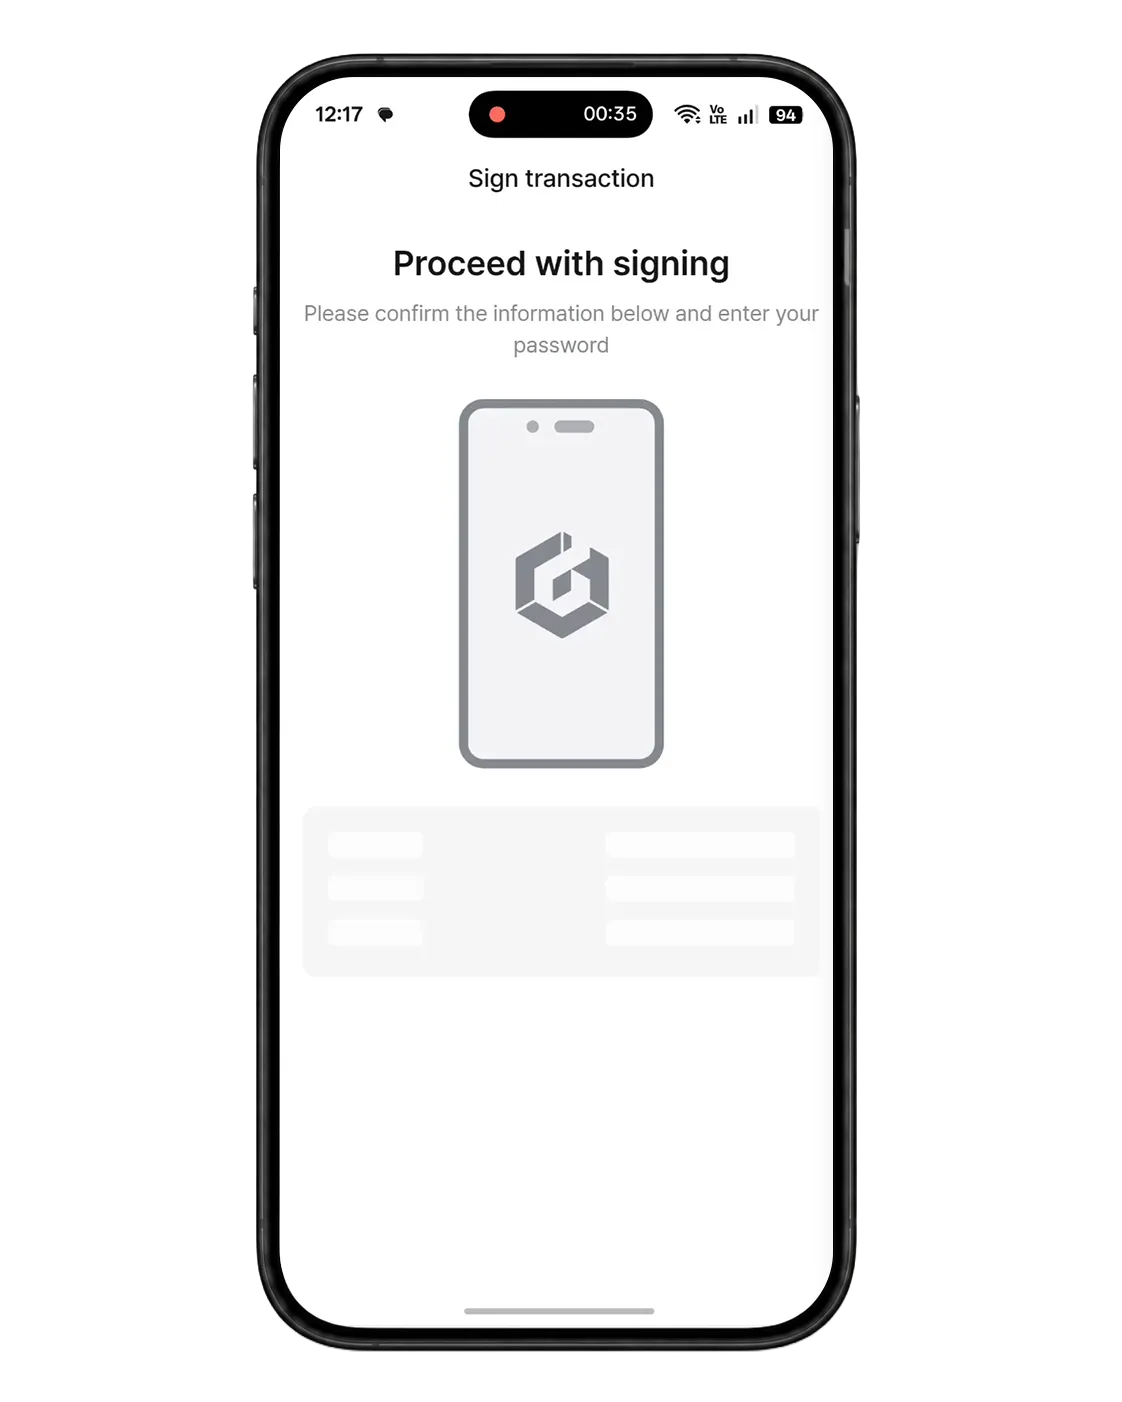
Authenticate only after reviewing the request. Cancel if anything looks unexpected.
Complete Your SOIL Onboarding
Steps 4–5: Enter and Confirm Your Email
After the wallet is connected, the onboarding panel moves to Sign in to newsletter. Enter an email address you can access, read the linked terms and policy, tick the confirmation box, and continue.
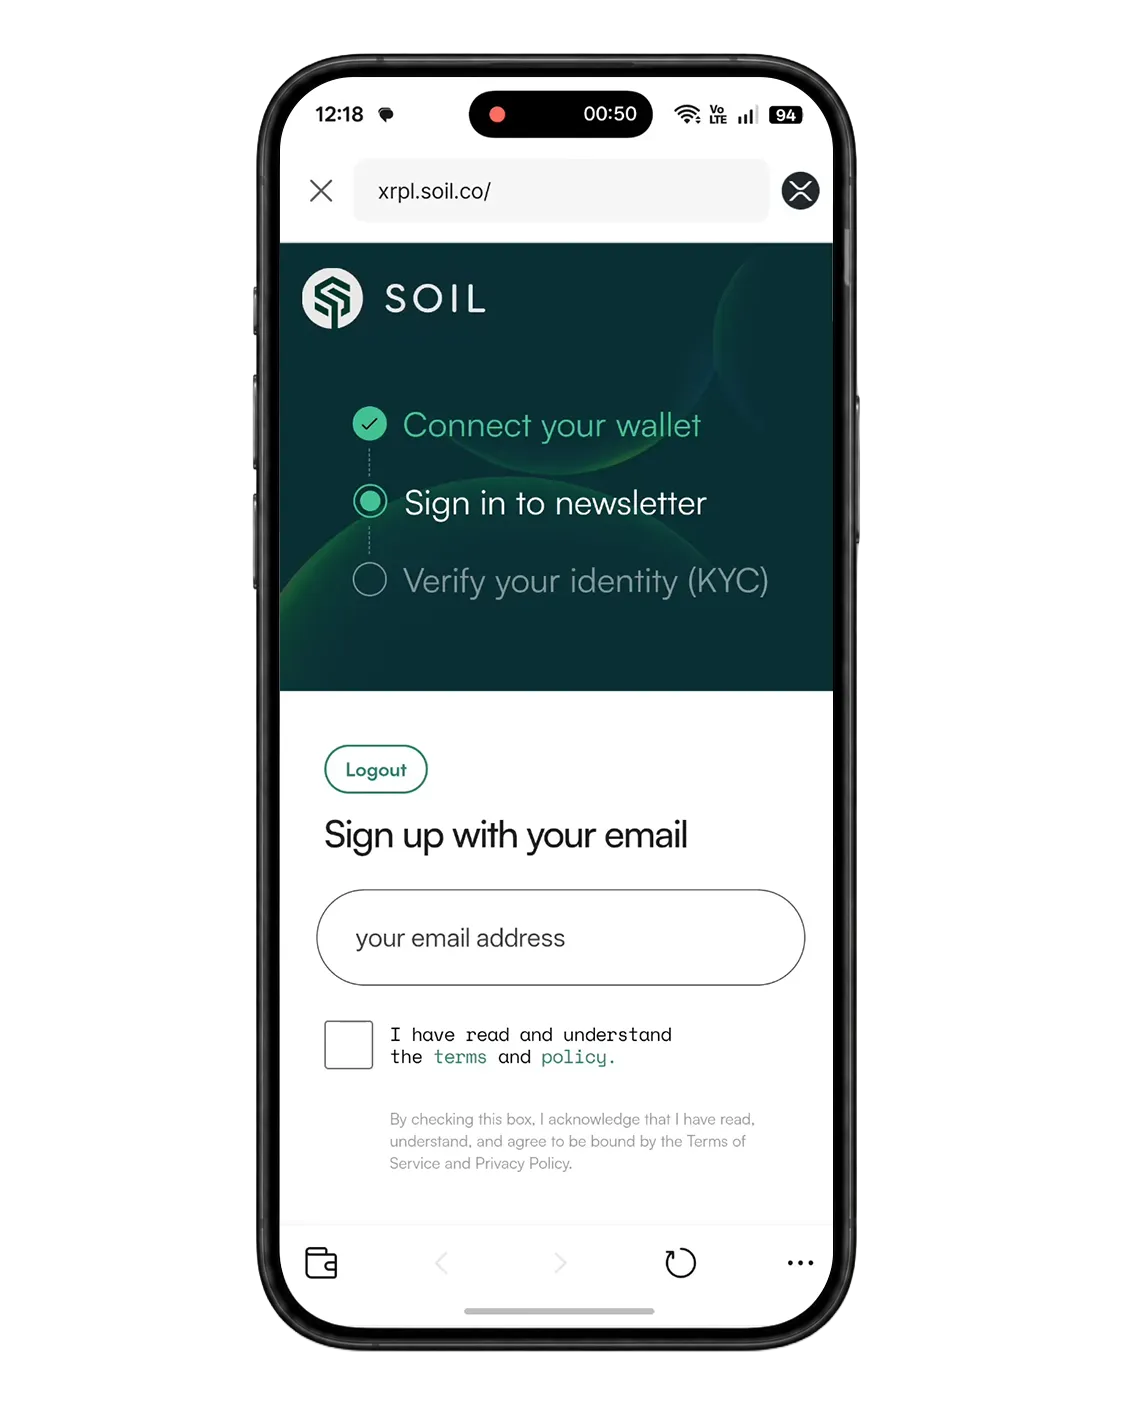
Enter your email and accept the applicable terms before moving to the next step.
SOIL then asks you to check your inbox. Keep the page open while you confirm the subscription. If the message does not arrive, check your spam or promotions folder. Use Edit Email Address if you need to correct the address.
Open the message from SOIL and tap Confirm your subscription. Return to the SOIL XRPL page after the confirmation succeeds.
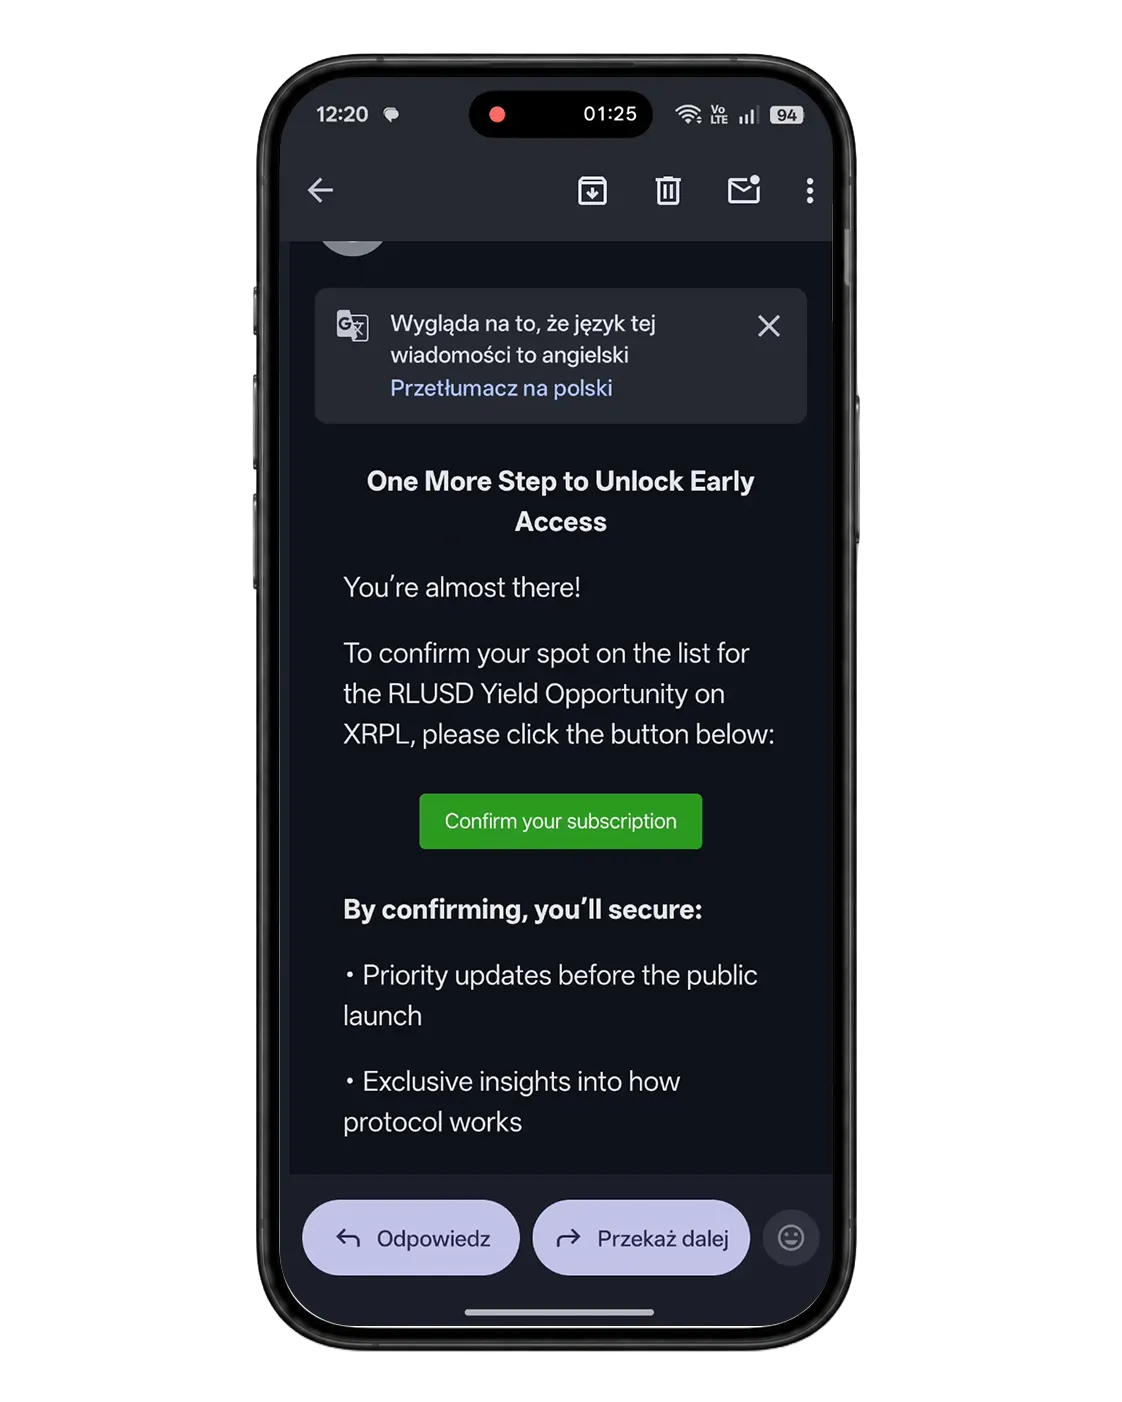
The email confirmation unlocks the next onboarding stage.
Step 6: Select Individual KYC
Back in SOIL, the first two onboarding items should show as complete. Under Identity Verification, select Individual (KYC) for a personal account.
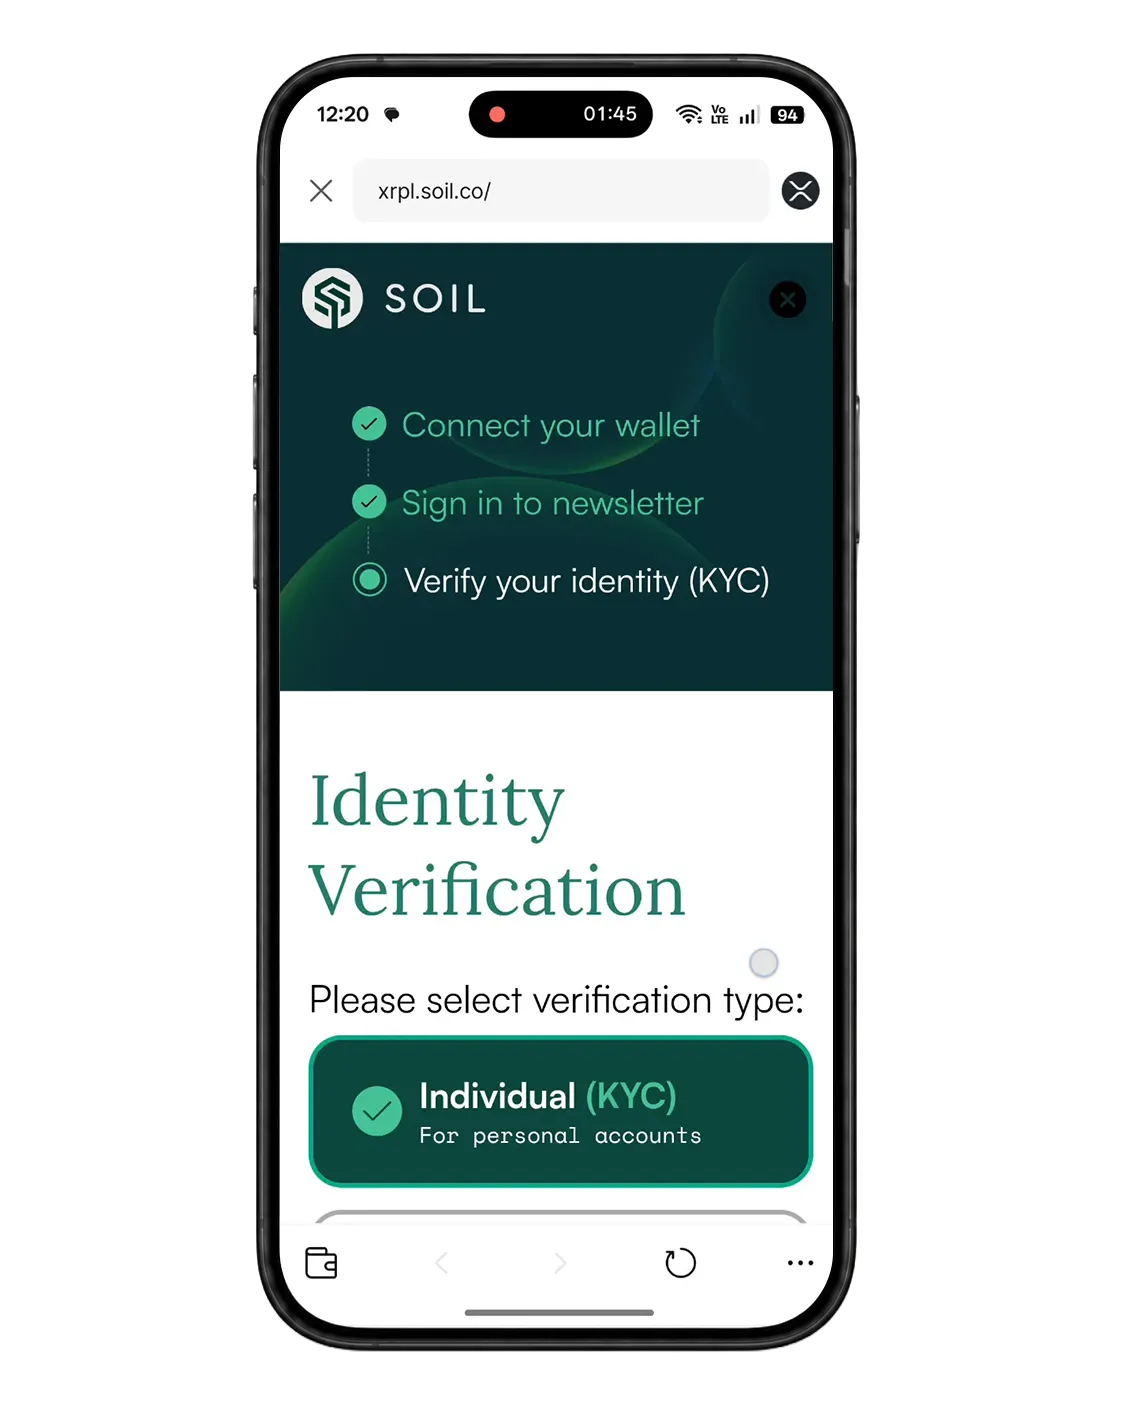
Choose the verification type that matches your account.
Steps 7–8: Complete Identity Verification
SOIL uses Sumsub for the verification flow. The process shown in the app includes:
- email verification;
- an identity document;
- a liveness check.
Tap Start verification, review the privacy information and consent notice, and continue. If Sumsub asks you to verify your email, enter the one-time code sent to your inbox.
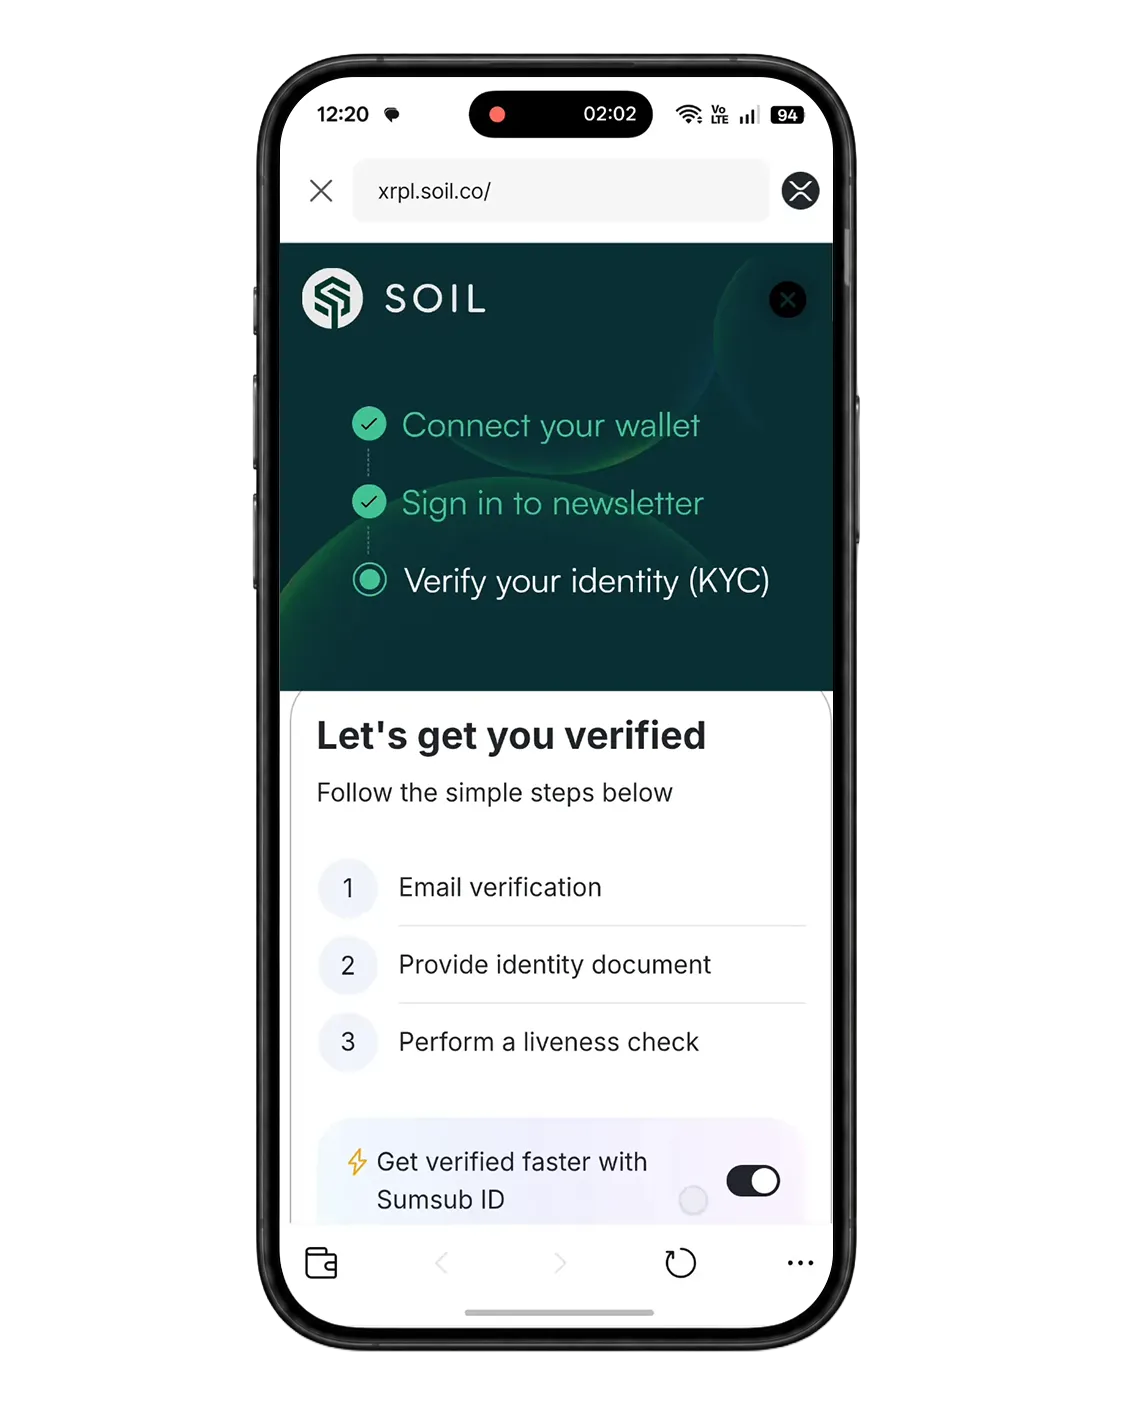
The verification module explains the checks required before you begin.
Choose the issuing country and the document type you want to use. Depending on the document, Sumsub may request the front and back. Follow the upload instructions and make sure every detail is sharp and readable.
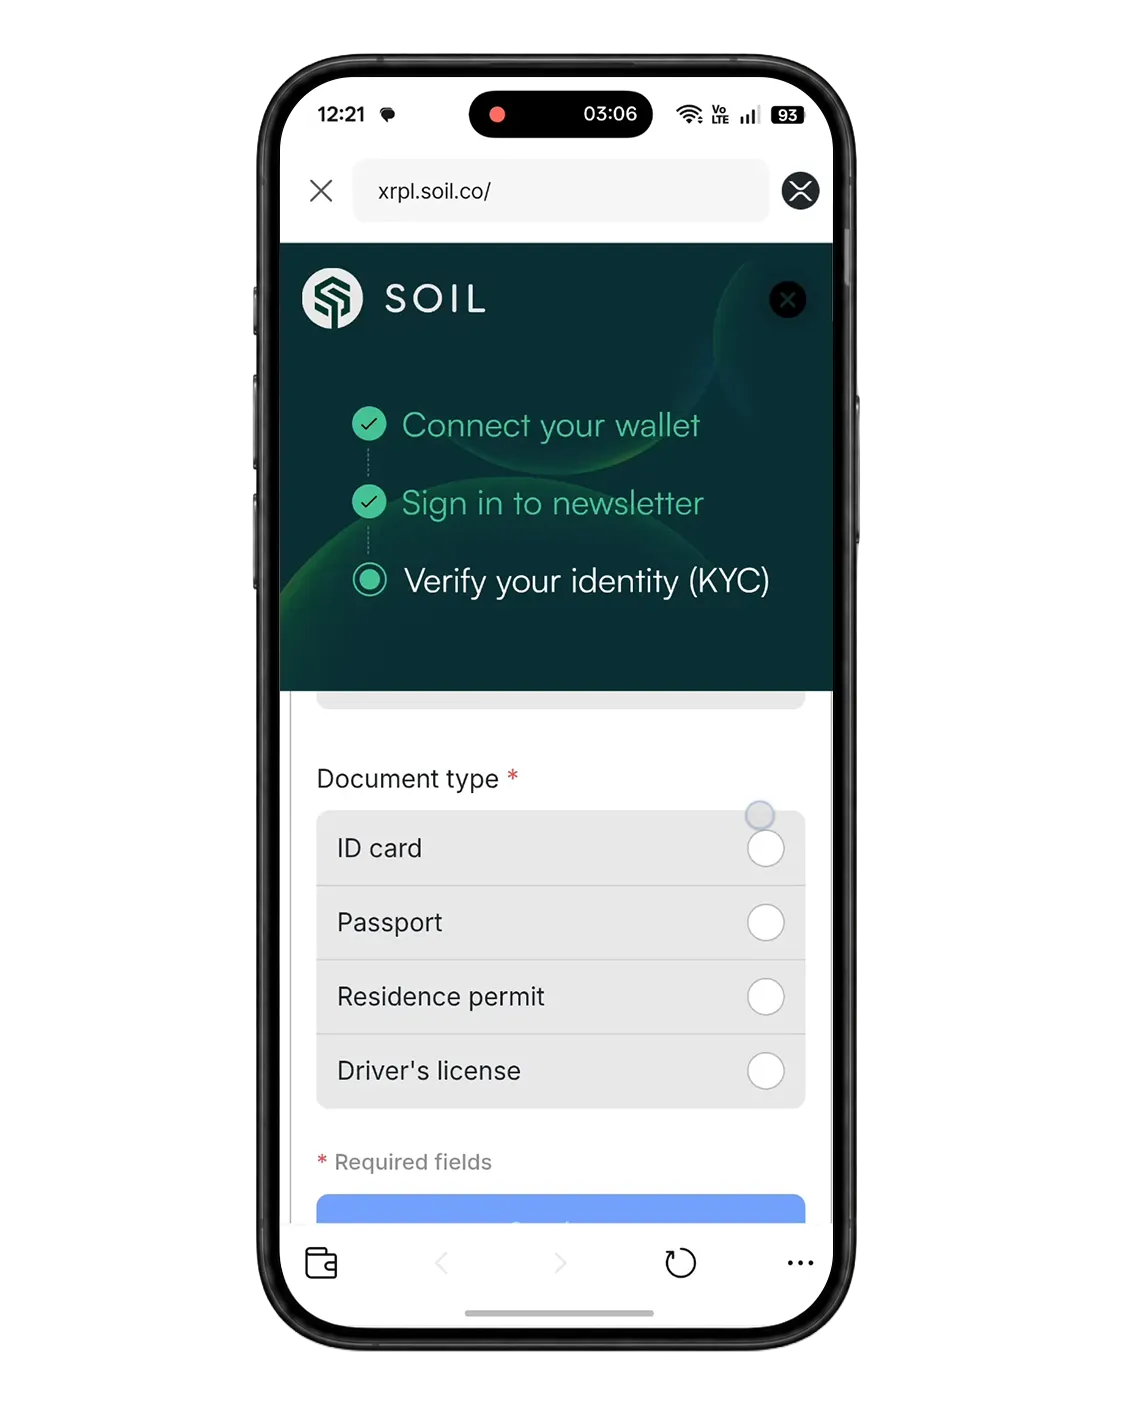
Use an accepted, valid document and follow the on-screen requirements.
For privacy, this guide does not reproduce the screens containing the user's document images.
Steps 9–10: Complete the Liveness Check
Allow camera access and prepare for the liveness check. Use good, even lighting, keep your face inside the frame, and remove anything that obscures it if the instructions ask you to do so. Follow the movement prompts on screen.
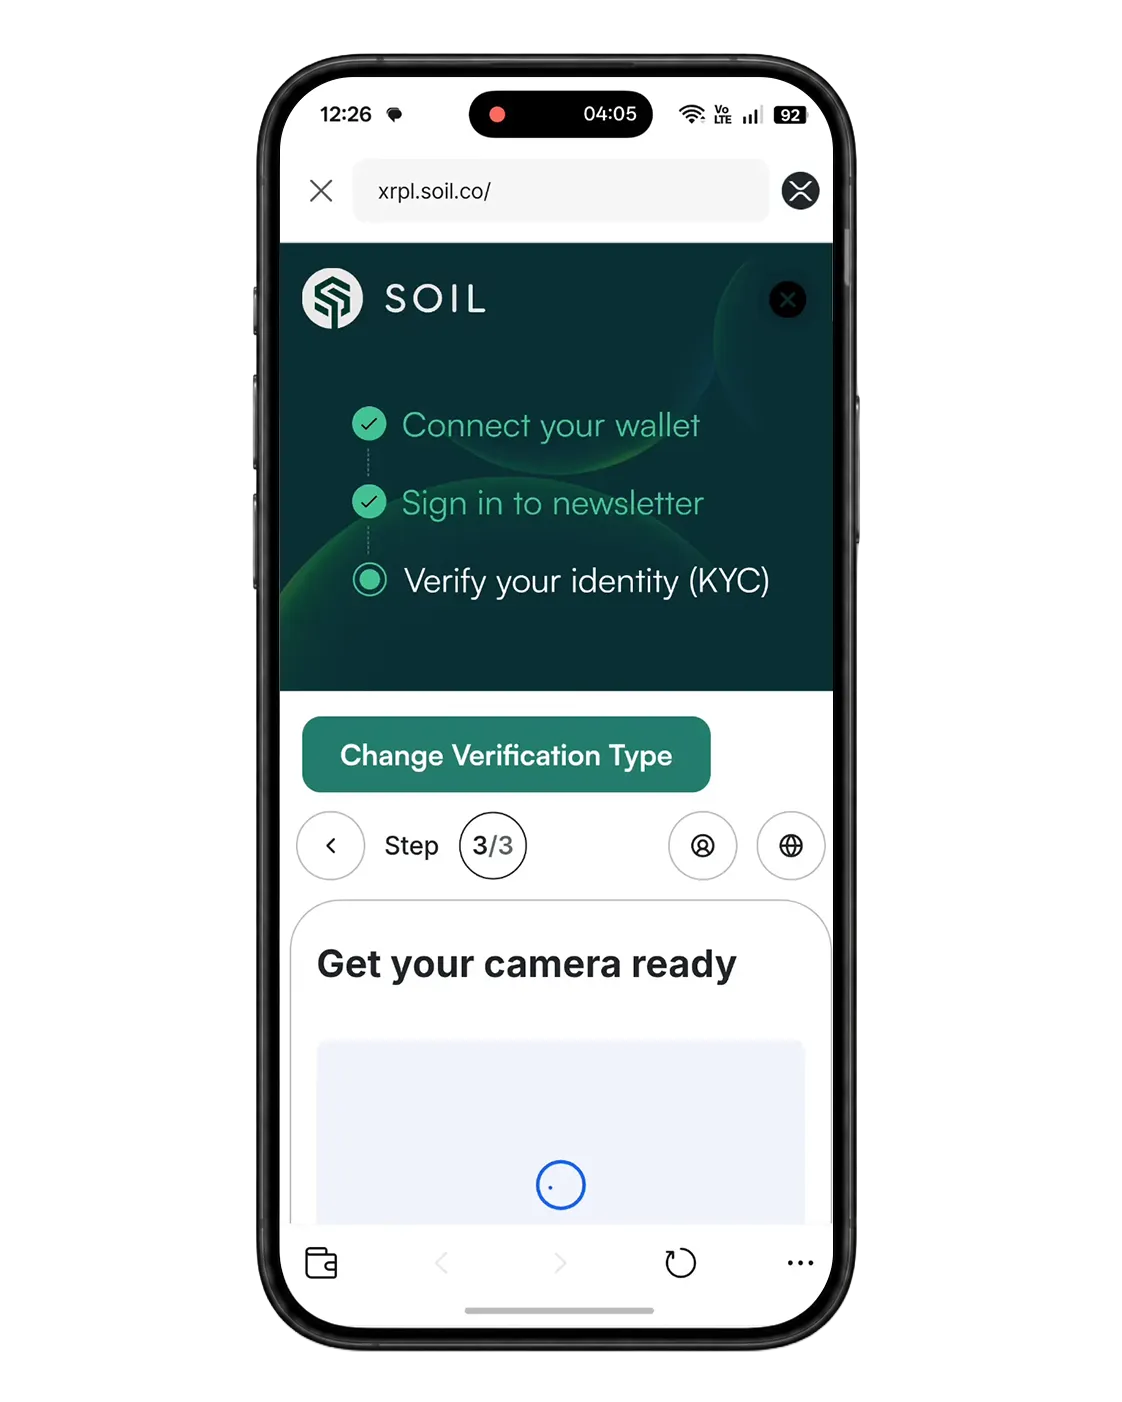
Good lighting and a steady phone help the liveness check complete smoothly.
After the liveness check, Sumsub processes the submitted information. Keep the page open and wait for the status to update. If additional information is required, follow the new instructions shown in the verification module.
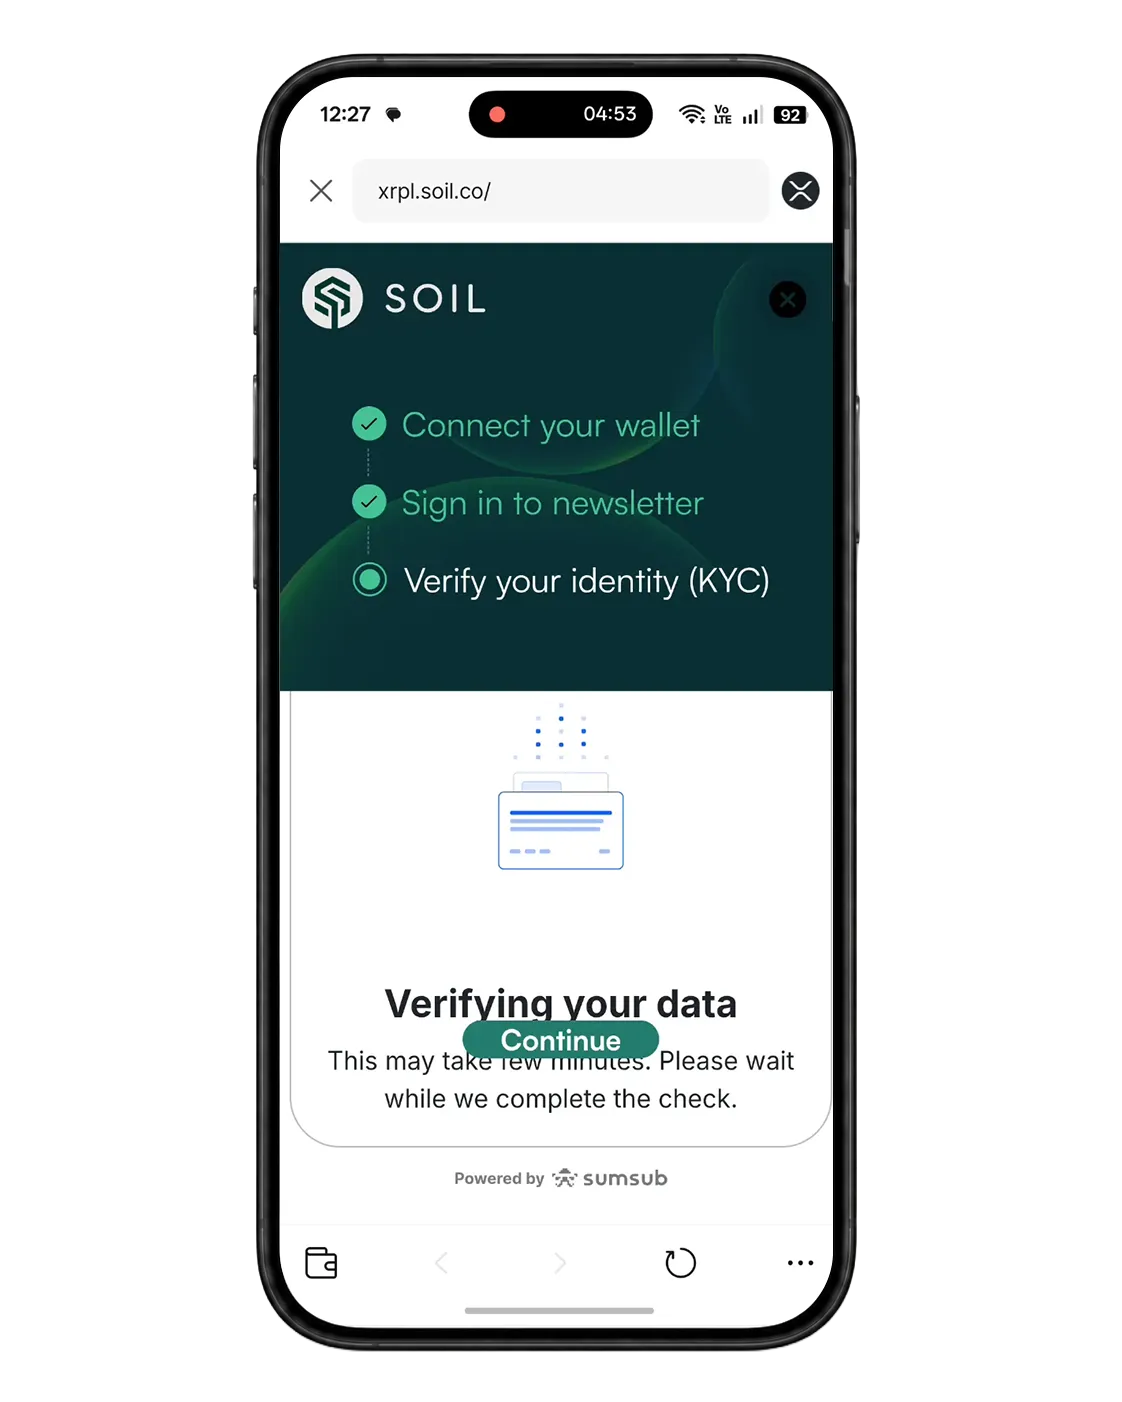
The onboarding flow continues after the identity check is approved.
Allocate XRP to the XRP Vault
Step 11: Review the Live Vault Terms
Once onboarding is complete, return to the vault page and locate the XRP Vault. Before entering an amount, review the current rate, minimum allocation, notice period, available balance, and any other terms displayed in the live product.
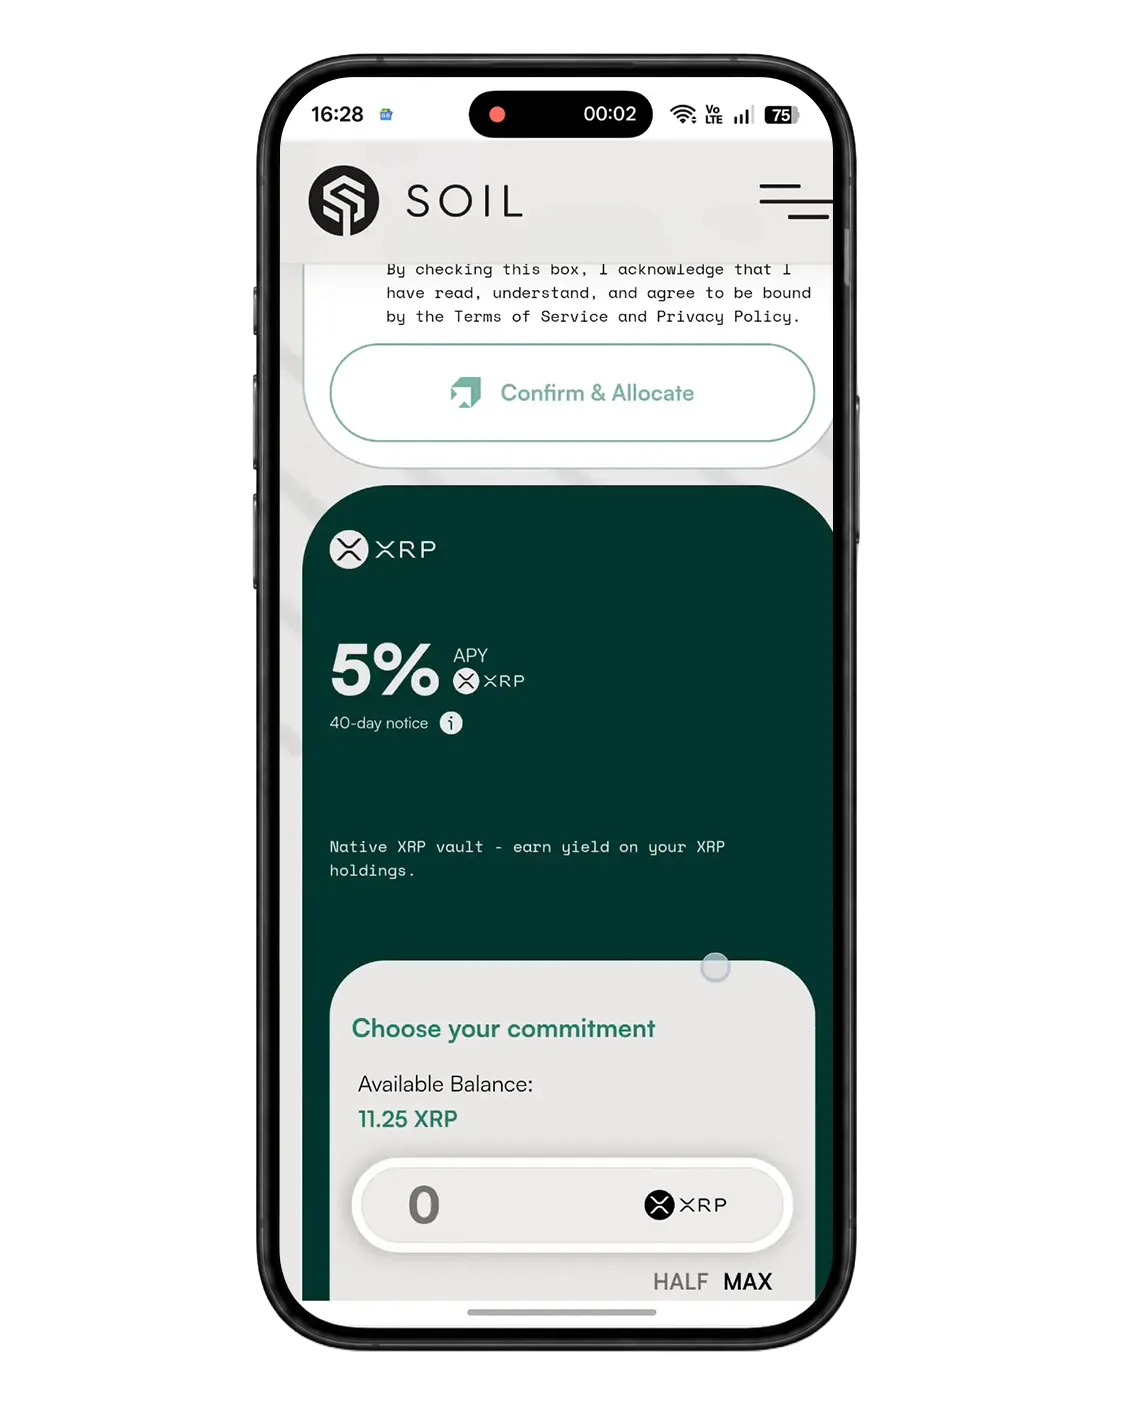
Always use the live vault screen as the source of truth for current terms.
Step 12: Enter the XRP Amount
Enter the amount you want to allocate or use the slider. Make sure the amount satisfies the minimum shown on screen and that the wallet retains any balance required by the XRP Ledger or D'CENT.
In the recorded example, the user enters an amount and adjusts it before confirming. Your amount and available balance will be different.
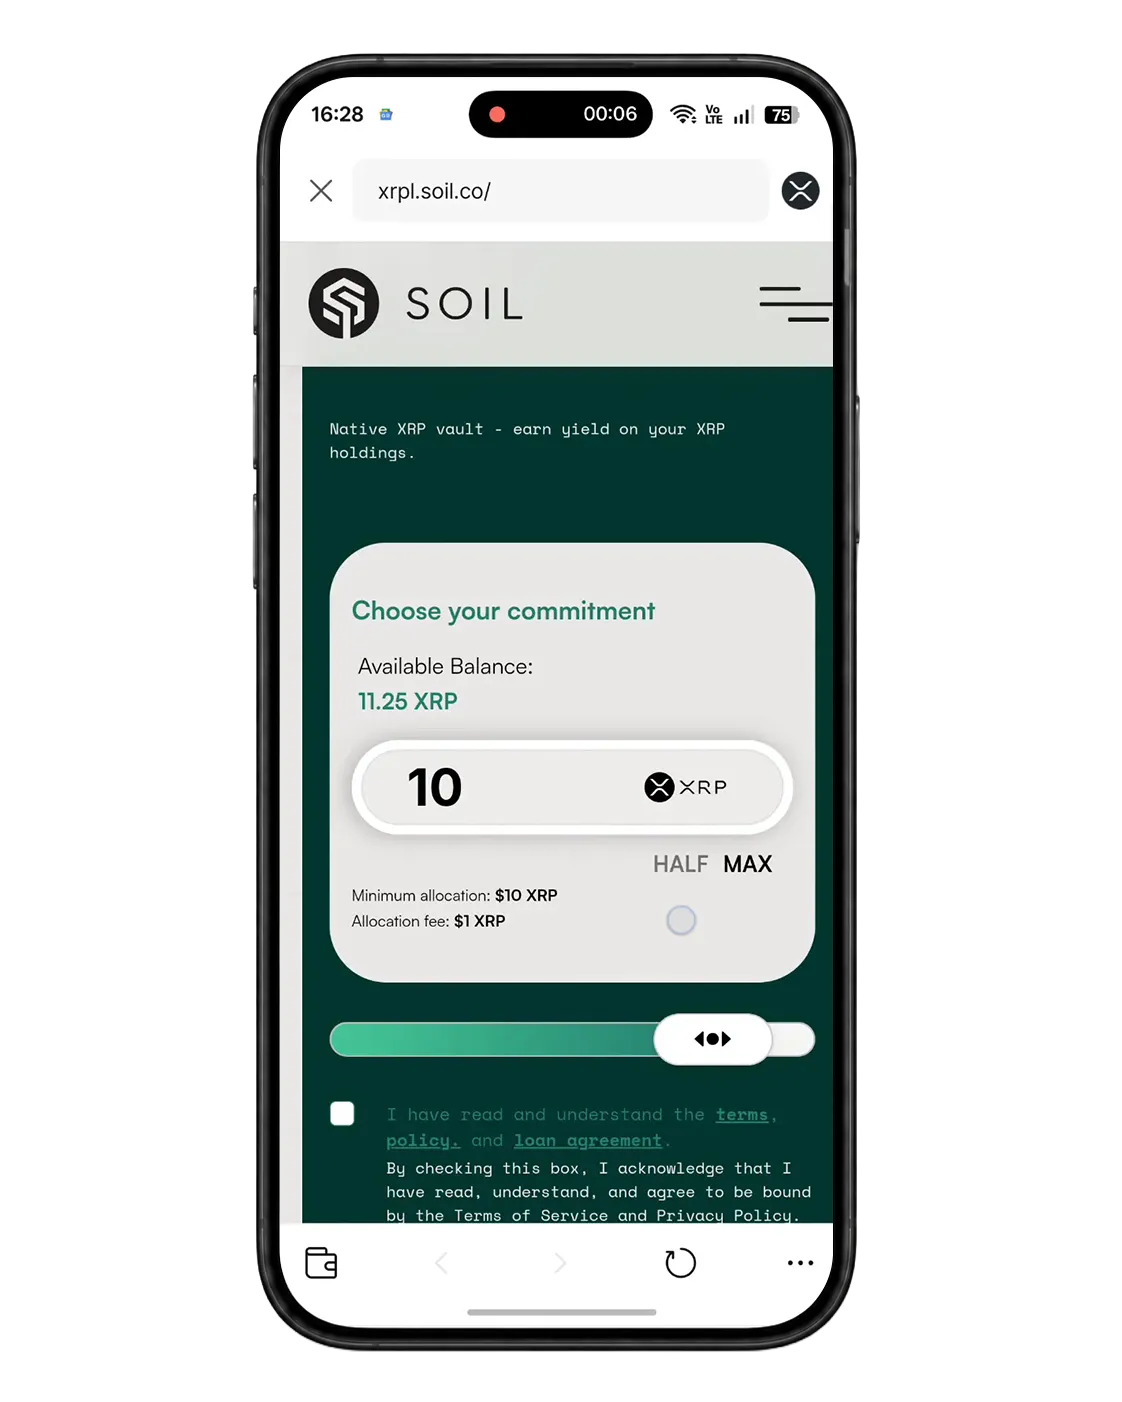
Check the amount carefully before accepting the terms.
Step 13: Accept the Terms and Start the Allocation
Read the acknowledgement next to the checkbox, including the linked Terms of Service and Privacy Policy. Tick the box only if you agree, recheck the final XRP amount, and tap Confirm & Allocate.
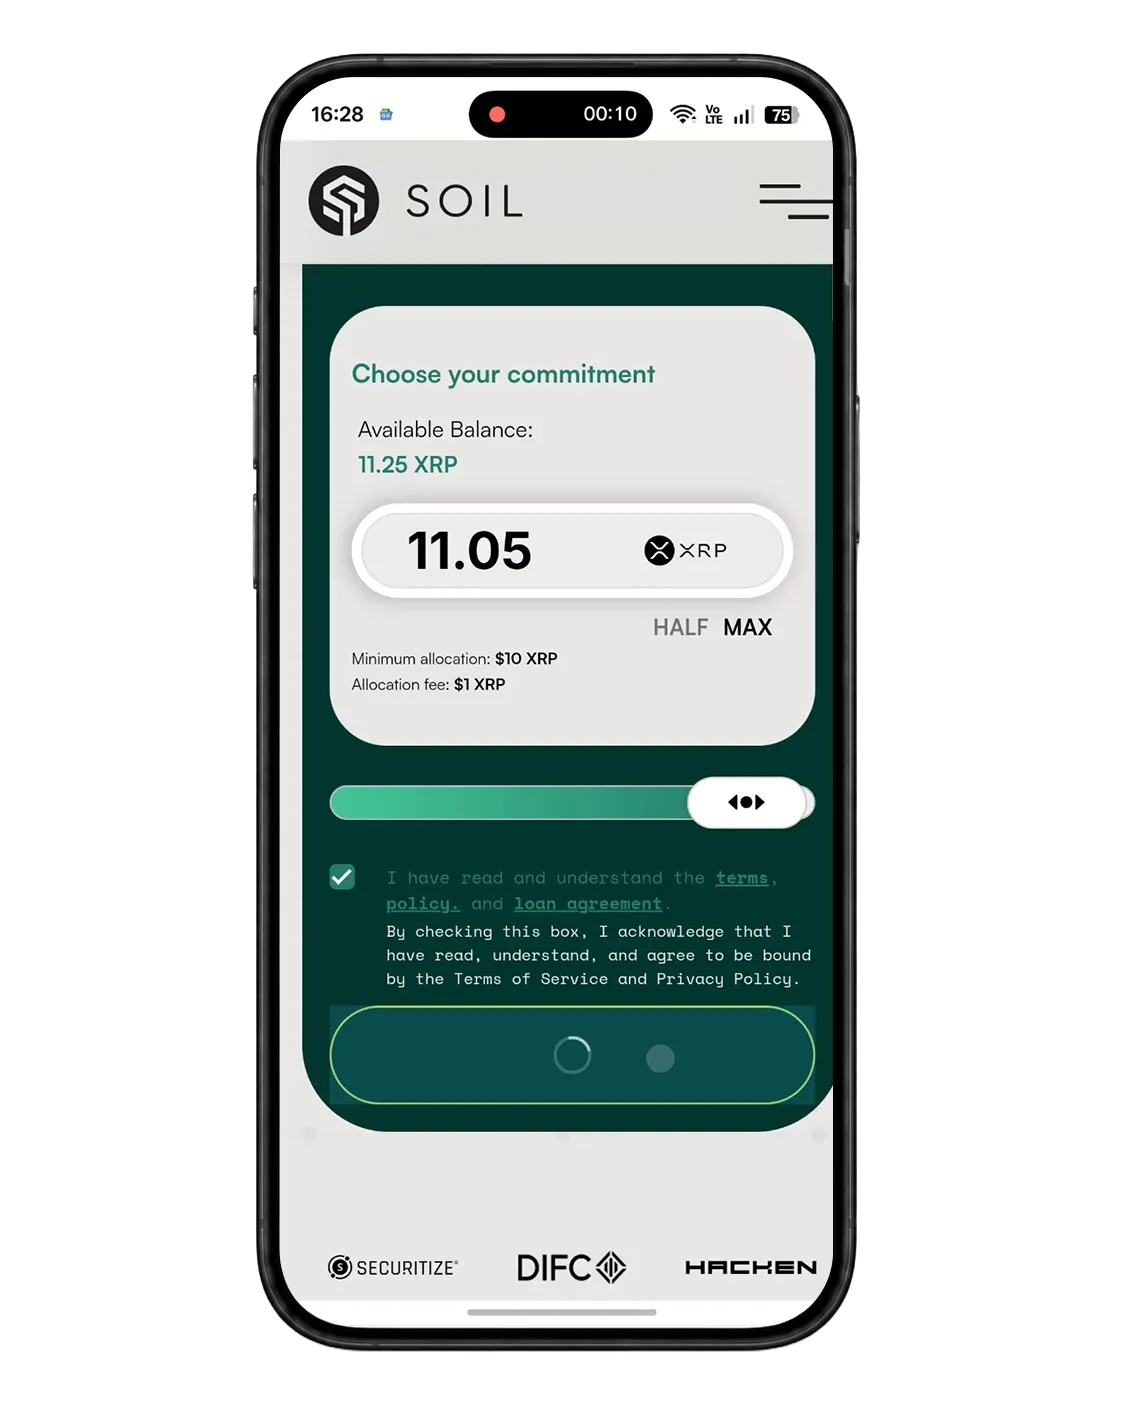
This action starts the transaction approval flow in D'CENT.
Steps 14–15: Approve the Allocation in D'CENT
D'CENT opens another Connect Dapp screen. This is expected: the browser is handing the allocation request to the wallet for approval. Verify the SOIL origin and the XRP account again, then tap Connect.
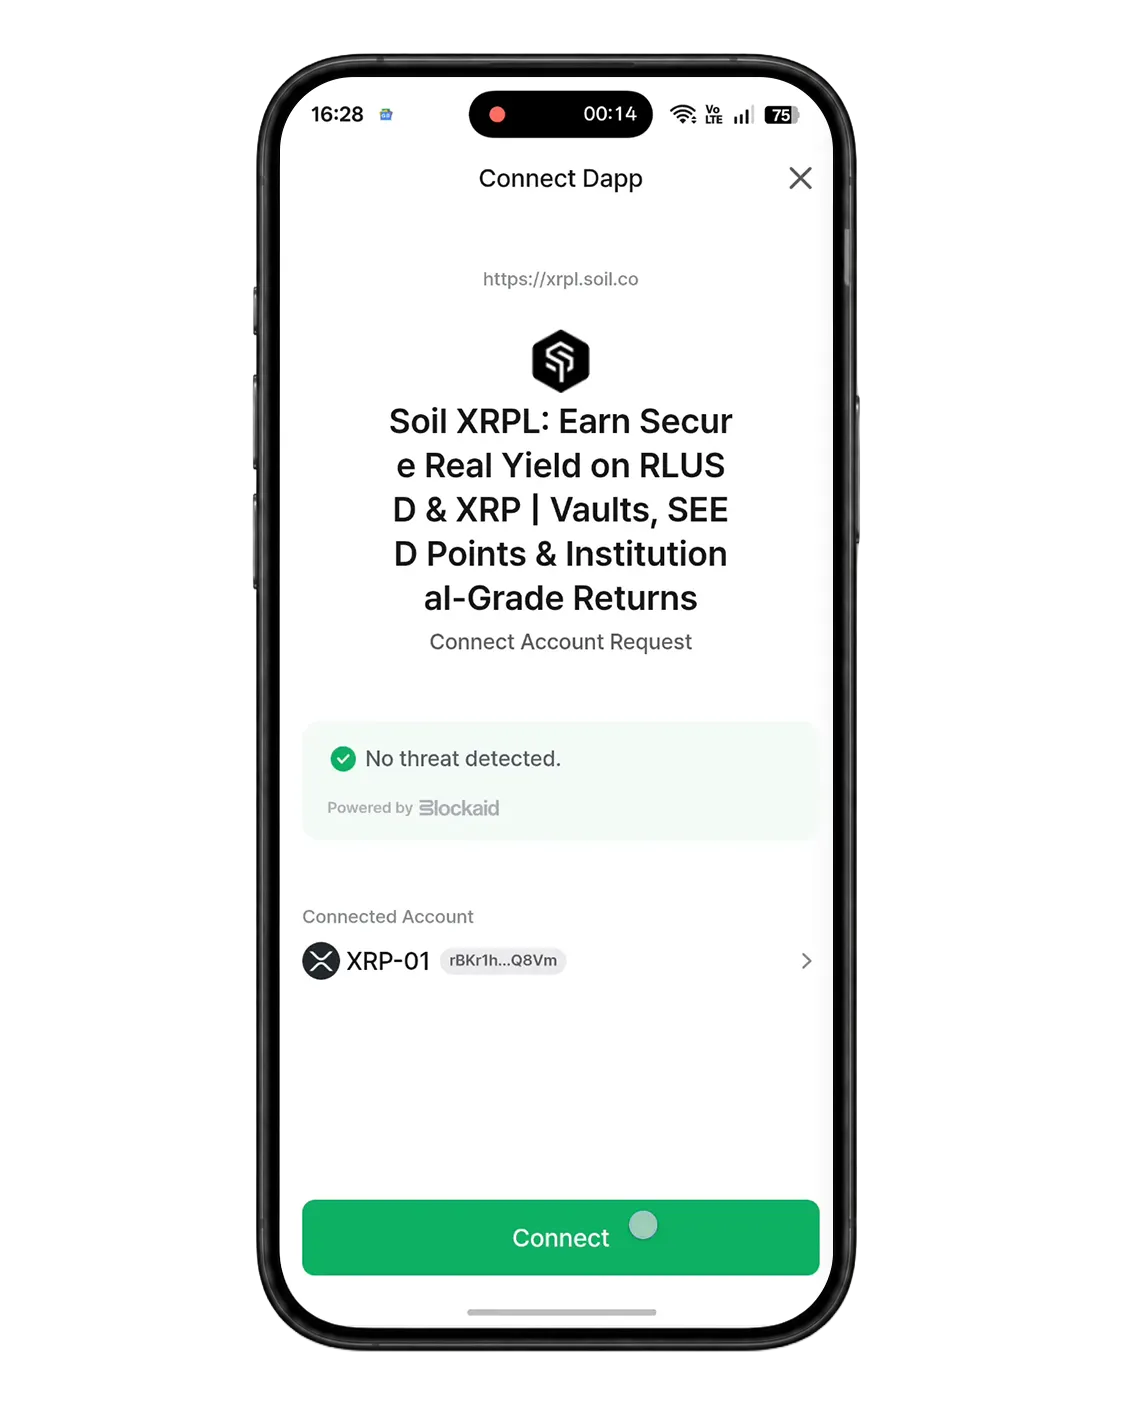
Verify the origin and account every time the wallet opens.
On the Signature Confirmation screen, review the request origin, sending account, amount, destination, and any other parameters shown by D'CENT. If they match the allocation you created on SOIL, tap Sign. Authenticate when D'CENT moves to the Proceed with signing screen.
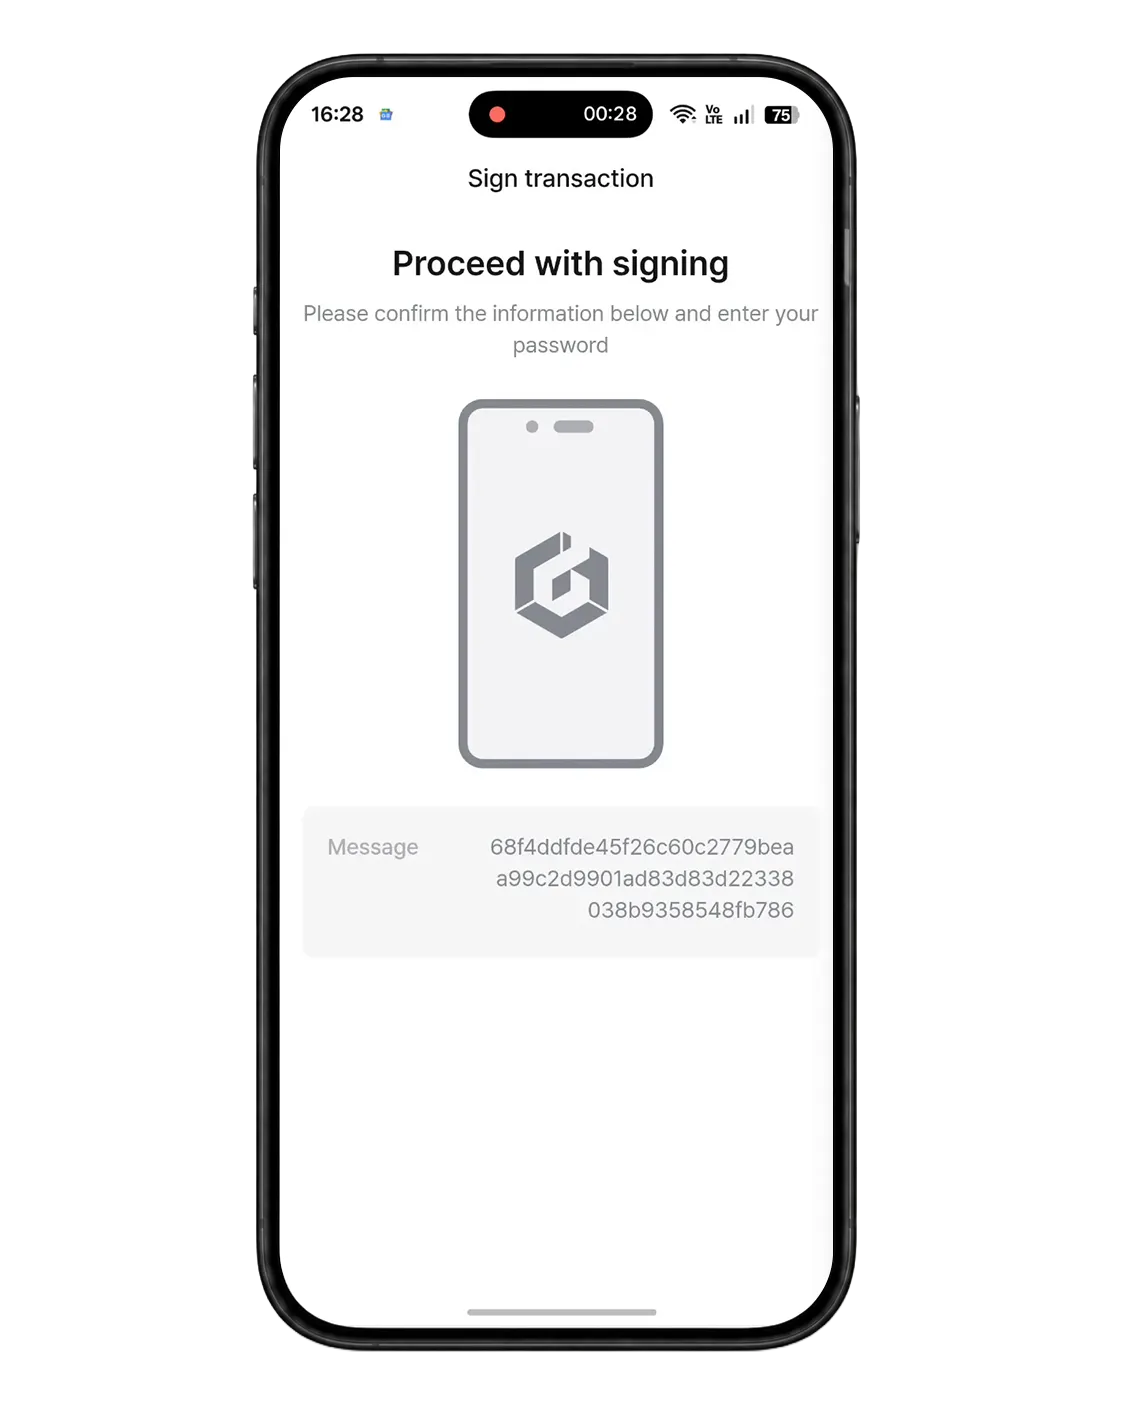
Your authentication allows D'CENT to complete the wallet signature.
Step 16: Wait for Blockchain Confirmation
SOIL displays Processing allocation while it waits for confirmation. Do not immediately submit the same allocation again. Keep the page open and allow the status to update.
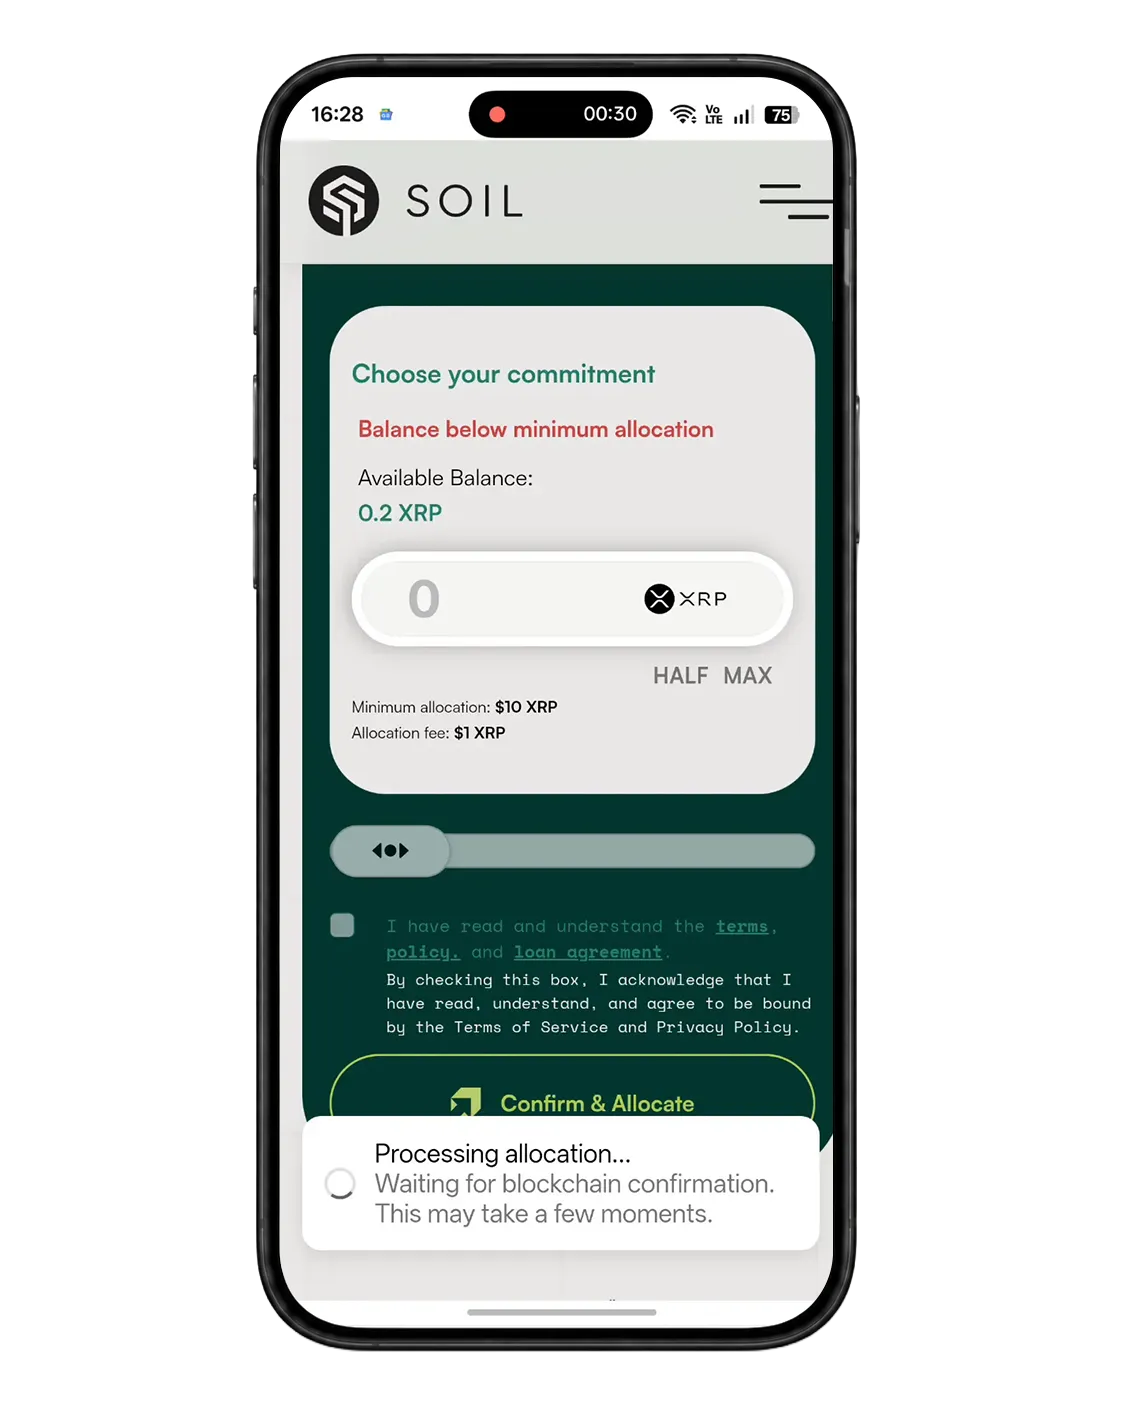
Processing time can vary while the transaction is being confirmed.
Step 17: Check Your Allocation Result
When the transaction is confirmed, SOIL displays Allocation successful. Review the summary, including the principal added, new principal, rate, status, cooldown, and notice period shown for your allocation.
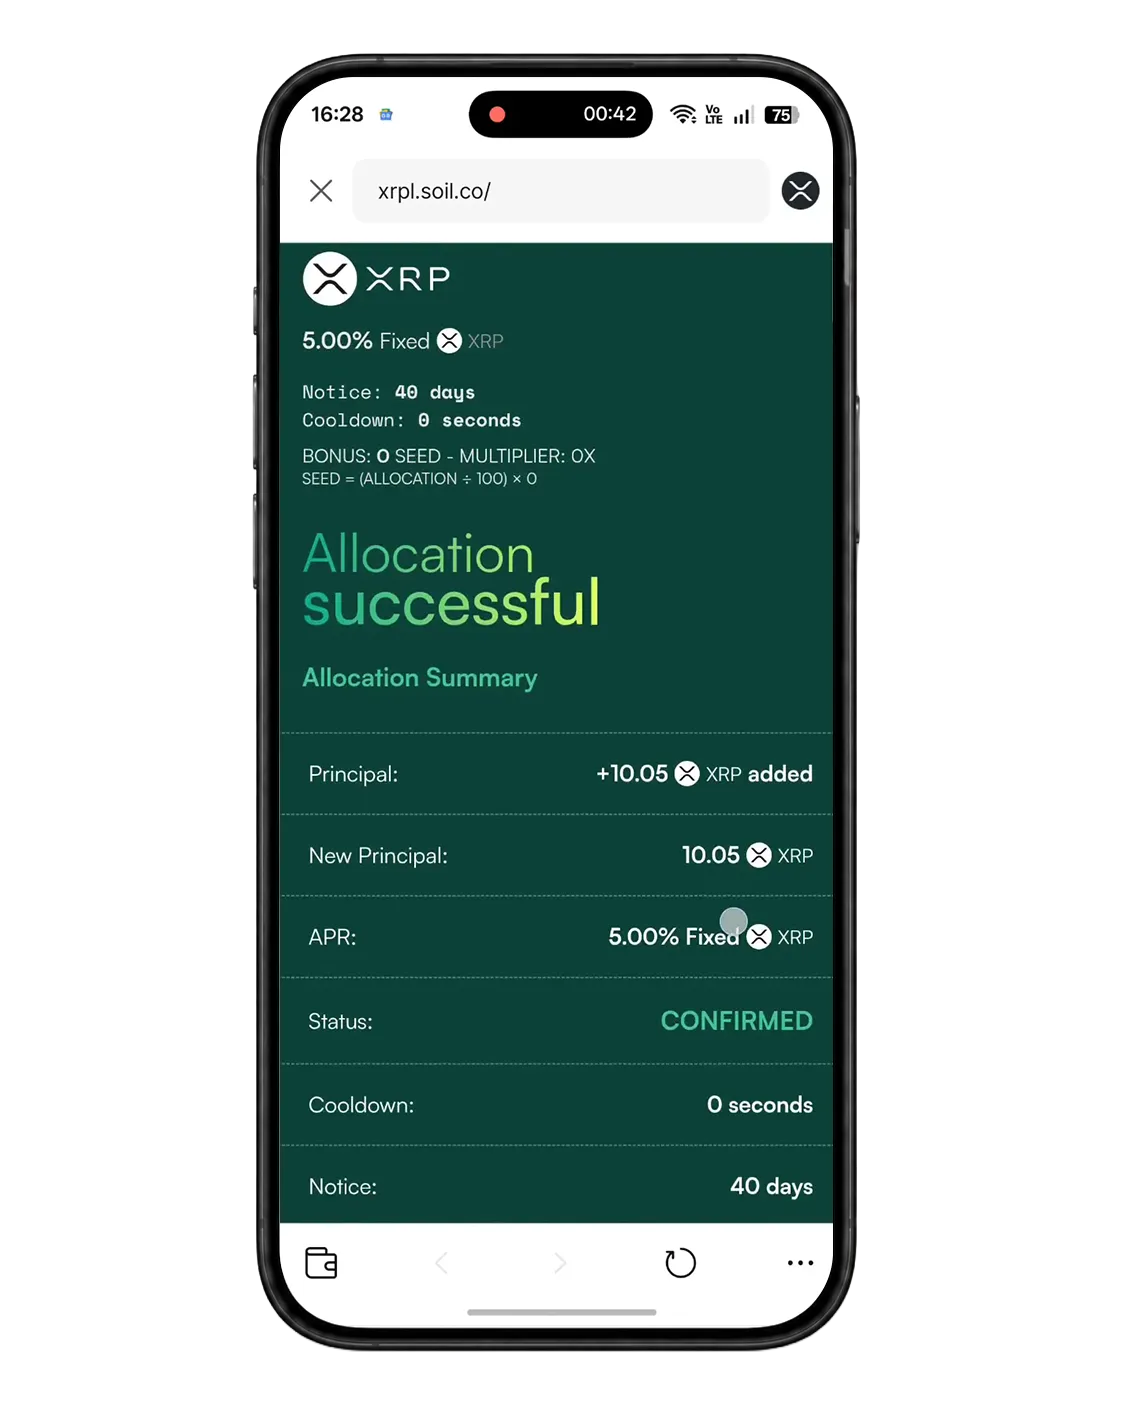
The success screen confirms that the XRP allocation has been recorded.
Scroll through the result and keep the transaction hash for your records. You can use Go to Dashboard to view the account or Make Another Allocation if you intend to start a separate transaction.
After the wallet, email, and KYC checks are complete, open the SOIL dashboard and confirm that Wallet, Email, and Identity (KYC) are marked as connected or verified. Your investment data may take a moment to appear after a newly confirmed transaction. From the dashboard, you can review your XRP Vault allocation and follow its status from one place.
Troubleshooting
If something in the flow does not complete as expected, try the following:
- Confirm you are opening
https://xrpl.soil.coand that every D'CENT Connect Dapp request shows the same origin. - If the newsletter email does not arrive, check spam or promotions, or use Edit Email Address and try again.
- If KYC fails, common causes include a blurry, damaged, or expired identity document; a selfie that does not match the document; personal information that does not match the document exactly; poor lighting during the liveness check; or selecting the wrong account type.
- You can retry KYC from the verification screen. Use a valid document, clear images, good lighting, and enter your name and date of birth exactly as shown on the document.
- If an allocation stays on Processing, keep the page open and avoid submitting the same allocation again until the status updates.
- If issues continue, contact support at https://xrpl.soil.co/support and include any error message shown on screen.
Final Security Checklist
- Never share your D'CENT recovery phrase or private key with SOIL or anyone else.
- Verify that every wallet request comes from
https://xrpl.soil.cobefore tapping Connect or Sign. - Review the XRP account, amount, and destination shown in D'CENT before authenticating.
- Cancel any wallet request that looks unexpected.
- Always use the live vault screen as the source of truth for rates, minimums, notice periods, and other terms.
- Keep the transaction hash from a successful allocation for your records.
Always verify the live vault terms and every D'CENT request before signing.
Share